How to Deploy Frontend Applications on AWS
Deploying a frontend application on cloud infrastructure can present numerous challenges , from ensuring high availability to managing scalability. By outlining the steps involved in launching your frontend application on an Amazon Web Services (AWS) EC2 machine, this tutorial aims to help you overcome these challenges. You will discover how to efficiently set up your EC2 instance and make use of AWS’s powerful capabilities to launch your application and reach a global user base with the help of concise instructions and helpful hints. After reading this article, you should have the skills and assurance necessary to use AWS to its full potential for your front-end project.
With flexibility, scalability, and a vast array of cloud services, Amazon Web Services (AWS) offers a great foundation for hosting your front-end application. We’ll take a thorough, methodical approach in this tutorial to assist you in using an EC2 instance to install your front-end application on AWS. You will have a thorough understanding of the complete procedure by the end of this article, from configuring the EC2 instance for best performance to setting it up, ensuring your application is hosted securely and effectively in the cloud. Now let’s get started with the entire deployment and configuration procedure!
EC2 Instance
A virtual server offered by Amazon Web Services (AWS) called an EC2 instance (Elastic Compute Cloud) enables you to execute apps on the cloud. You can install an operating system, run apps, and control resources like CPU, memory, storage, and networking on it just like you would on a remote machine.
To put it another way, an EC2 instance is similar to renting a virtual machine from AWS for the purpose of hosting software, websites, or applications. Depending on your performance requirements, you can select from a variety of instance types, and you only pay for the time the instance is in use. Because EC2 is so scalable, you may adjust its resources to match demand.
Deploying your front-end application on AWS
particularly using an EC2 instance, can be straightforward if you follow these simple steps. Here’s a step-by-step guide:
- Create an aws account :
- Sign up at aws.amazon.com.
- Complete the basic setup for your account, including billing info.
- Checking the Status of an EC2 Instance :
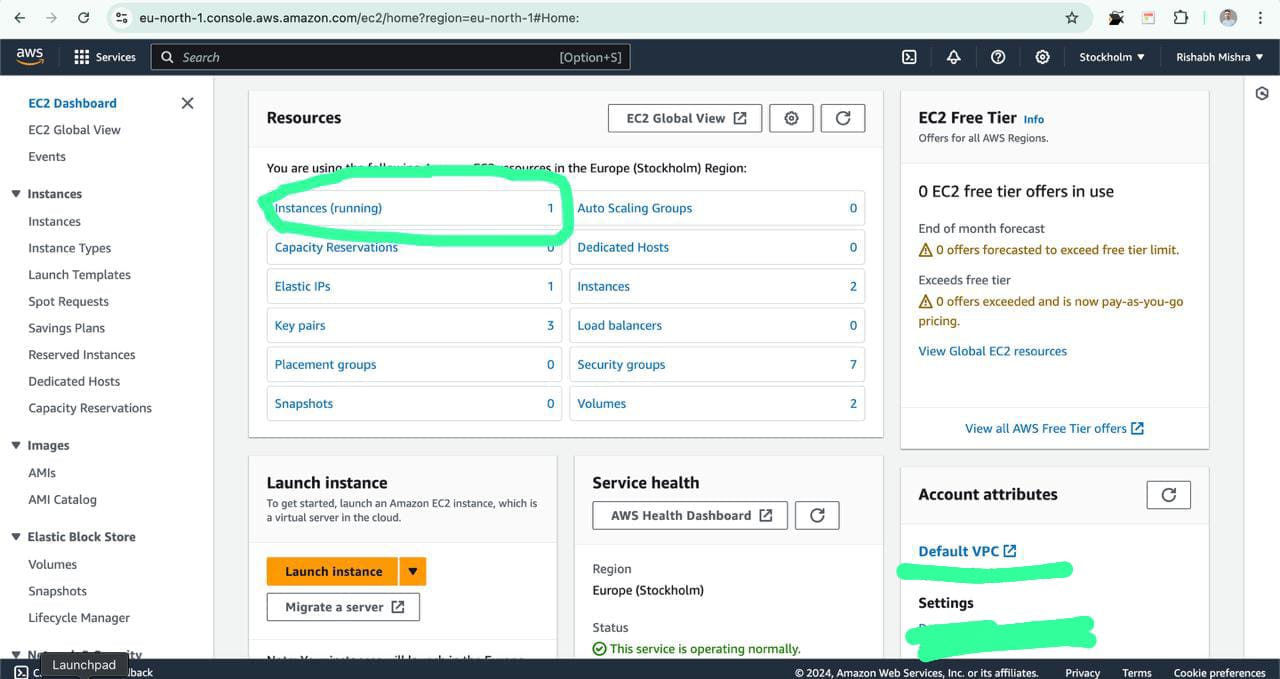
- Navigate to the Amazon Management Console.
- Look under Services for EC2.

- You will now see a screen showing you the current state of the ec2-instance, including whether it is running or not.

- Navigate to the EC2 Dashboard using the instance link and review the detailed status of the instance to monitor its health and performance metrics.
- Create a new ec2-instance :
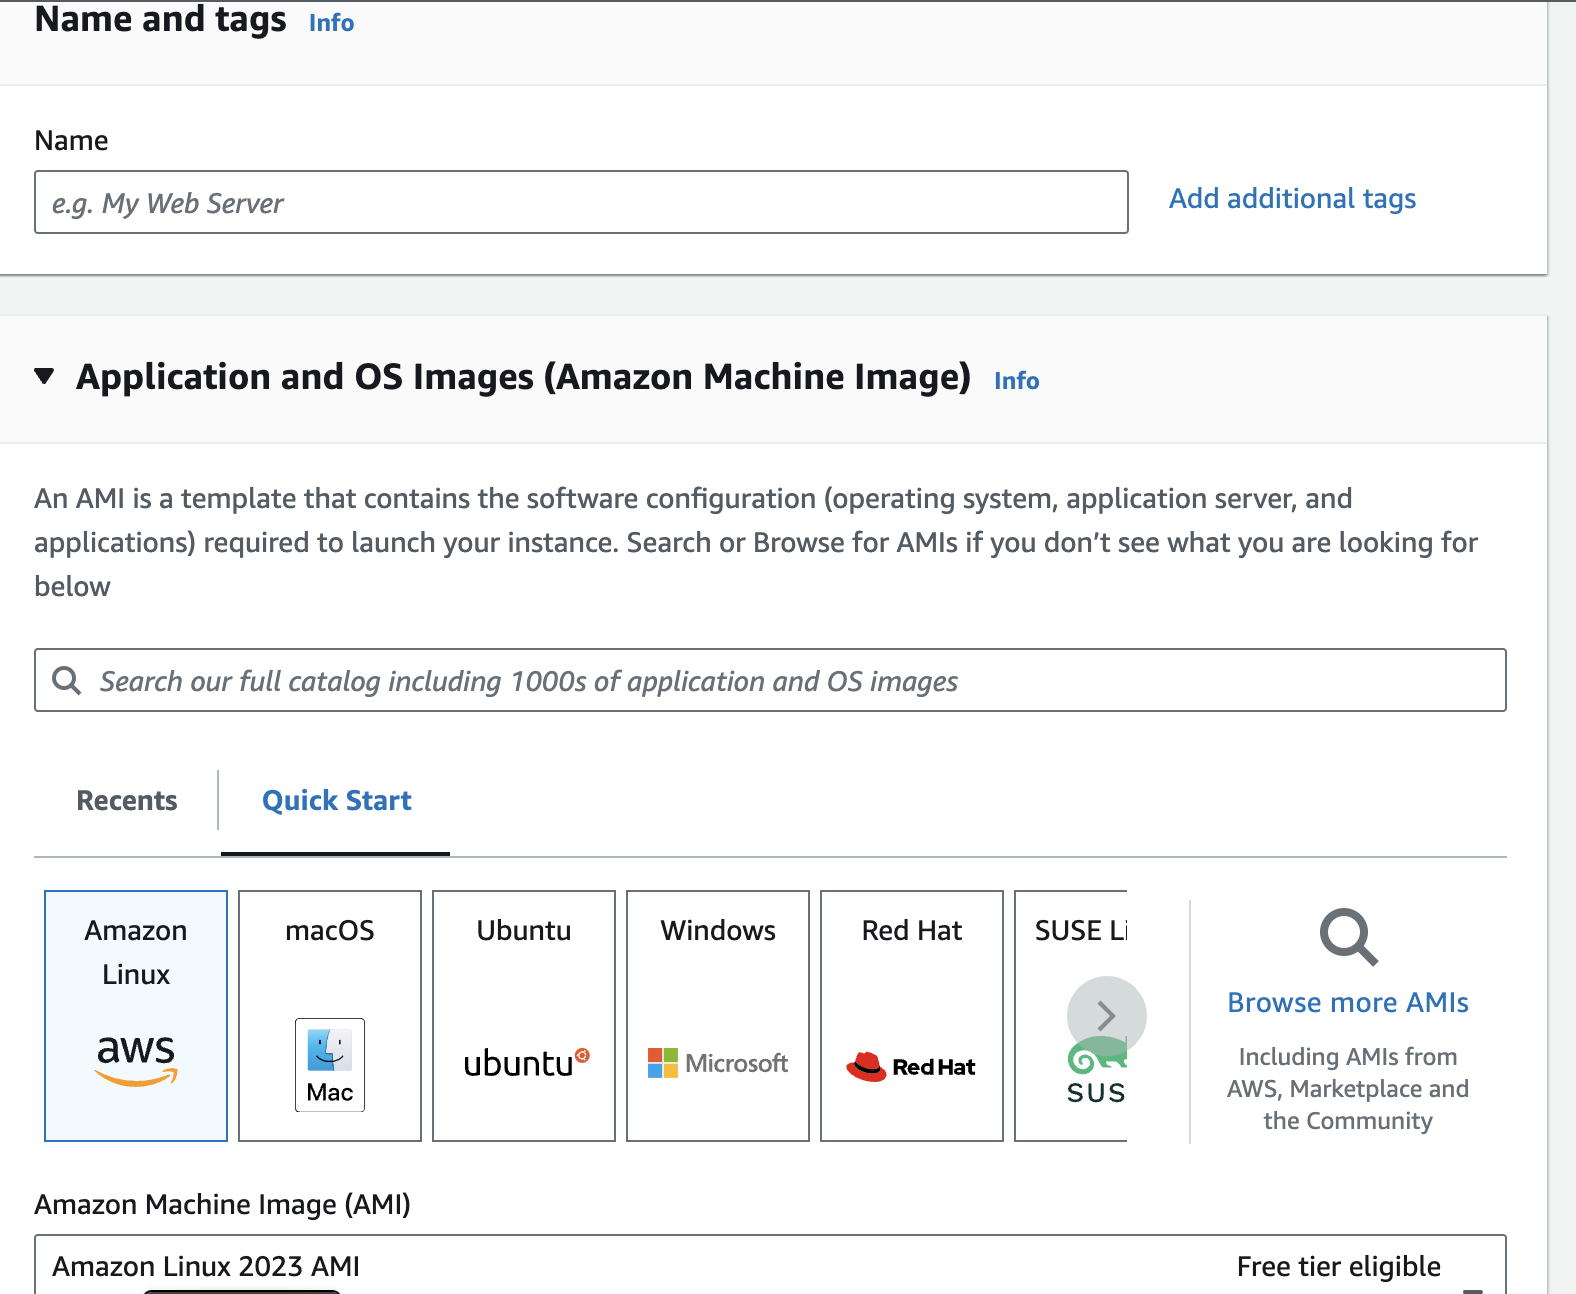
- In the EC2 Dashboard, click on the Launch Instance button. This will take you to the configuration page for creating a new instance.

- Select an Amazon Machine Image (AMI) from the available list.
- For beginners, the Amazon Linux 2 or Ubuntu Server AMIs are popular choices.

- Make sure to choose an AMI marked as Free Tier Eligible if you want to stay within the free usage limits.
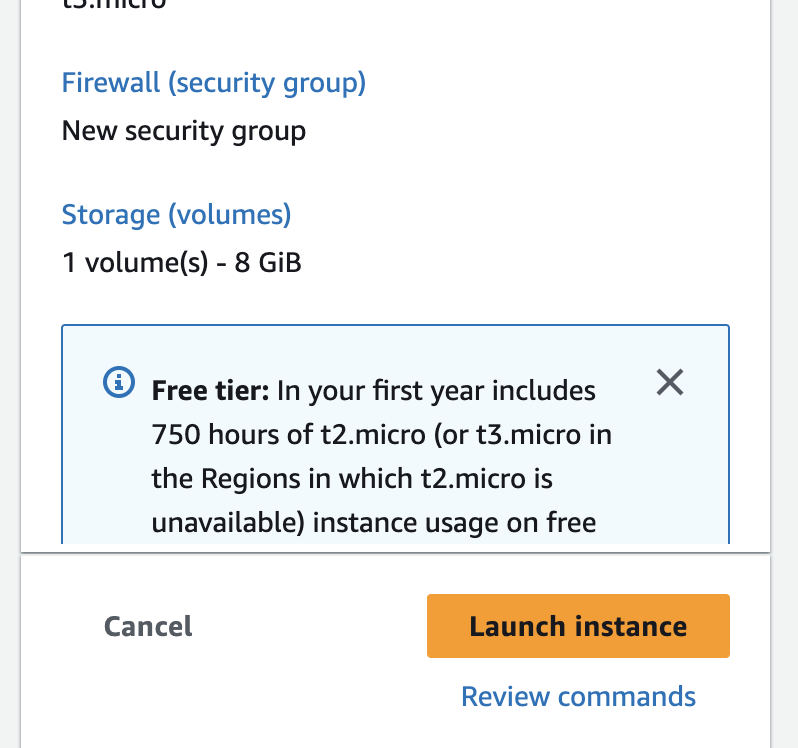
- Depending on your needs, choose an instance type. The t2.micro instance, which is free tier qualified, is a nice place to start for most uses.
- Give the instance’s storage volume some details.
- General Purpose SSD (gp2) storage is assigned with 8GB by default, which is usually enough for modest projects.
- You’ll need a Key Pair (a public-private key) in order to connect to your instance securely.
- Choose Create a new key pair, give it a name, and download the private key file (.pem) to your local computer if you don’t already have one.
- This.pem file needs to be kept safe because it will be used to log into your instance using SSH.
- Click Launch Instances.

4. Connecting to Your EC2 Instance via Terminal and Uploading Frontend Build Using FileZilla :
Part 1: Using a Terminal to Connect to Your EC2 Instance
Step 1: Launch the Terminal
On your local PC, open a terminal window. You can use PowerShell or Command Prompt on Windows. You can also use an SSH client such as PuTTY if you have one.
Step 2 : Go to the directory for your key pair.
Use the cd command to change the directory to the location of your.pem key file:
cd /path/to/your/keypair
Step 3 : Modify the Authentization for Your Key Pair
Make sure the permissions on your key file are accurate. Run the following command
chmod 400 your-key-pair.pem
Step 4 : Acquire the EC2 Instance’s Public IP Address
Locate your EC2 instance in the AWS Management Console, then take note of its public IP address.
Step 5 : Connect to Your EC2 Instance
Use the SSH command to connect to your instance. Replace your-key-pair.pem with your key file name, and ec2-user with the appropriate username for your AMI (for Ubuntu, use ubuntu):
ssh -i your-key-pair.pem ec2-user@your-instance-public-ip
Step 6 : Confirm Connection
Enter “yes” when asked to confirm the connection. Your EC2 instance should now be logged into for you.
Part 2: Uploading Frontend Build Using FileZilla
Step 1 : Install FileZilla
Download and install FileZilla Client on your local computer if you haven’t already.
Step 2: Launch FileZilla.
Once installed, launch FileZilla.
Step3: Configure the Site Manager
From the menu, choose File, then Site Manager.
Step 4: Include a New Website
Give it a name (such as “My EC2 Instance”) and click “New Site.”
Step 5: Configure the Connection
Please complete the following information:
- Host: The public IP address of your EC2 instance (e.g., 203.0.113.25).
- Protocol: Choose the SSH File Transfer Protocol, or SFTP.
- Type of Logon: Choose a Key file.
- User: Type either ubuntu (for Ubuntu) or ec2-user (for Amazon Linux).
- Key file: Use the file browser to choose your.pem key.
Step 6 : Connect to Your Instance
Press the Connect button. Verify any security alerts regarding the host key on the server if required.
Step 7: Navigate to the Destination Directory
Go to the directory (/var/www/my-app, for example) where you want to submit your frontend build files in the right pane (remote site). If this directory doesn’t already exist, you might need to create it first:
In the right pane, use the right-click menu to choose Create directory.
Step 8: Upload Your Frontend Build Files
- Go to the directory (build folder, for example) that holds your frontend build files on the left pane (local site).
- Drag the build files to the right pane to upload them to your EC2 instance after selecting them (you may use Ctrl or Shift to pick multiple files).
Step 9: Verify the Upload
After the transfer completes, verify that the files are uploaded correctly by checking in the right pane.
You’ve uploaded your frontend build files using FileZilla and are now successfully connected to your EC2 instance through the terminal. The following steps would usually be to set up a web server (such as Apache or Nginx) to serve these files over the internet.


